
Work in Progress Wednesday | Drawing with Graphitint

Graphitint pencils are tinted h2o-soluble graphite pencils built by Derwent. I’m utilizing them this week to challenge my pondering about coloration and system.
Experimenting with new supplies is a great way to expose unexplored prospects in your get the job done. I’ve labored with Graphitint pencils just before, and locate the complete principle of water-soluble drawing resources thrilling. It’s been a challenge for me to embrace them fully, on the other hand, since I’ve made a frame of mind and way of operating with classic products that I can count on and produce fairly predictable outcomes. What you will see in this article is the very first step to superior being familiar with these unique pencils and new opportunities with coloration.

First Wash
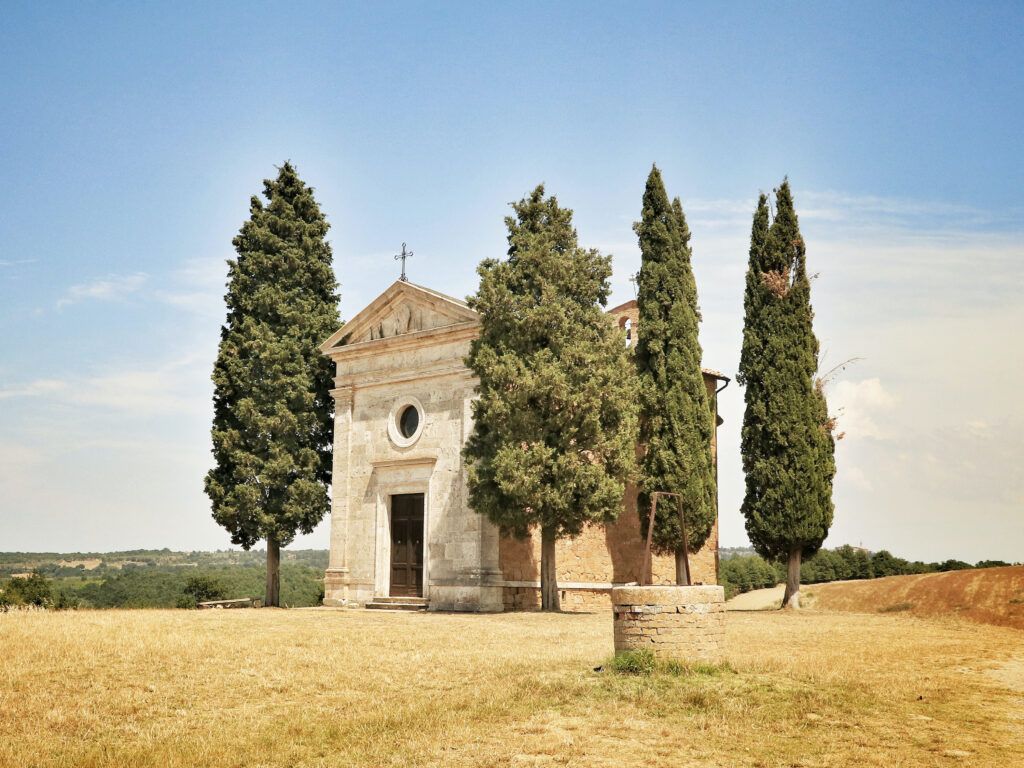
What I did: I lightly created the outlines of the main shapes, and then made use of “Ocean Blue #07,” to frivolously layer the sky, distant hills, trees, and shadow styles. With a #10 brush loaded with h2o, I washed the place and allow it dry.
What I’d Do In different ways: See the uneven regions in the sky? This is mainly because my brush was as well little and I was not equipped to provide an even wash to the overall sky spot in 1 go. On the up coming consider, I’d use a more substantial #14 watercolor brush, which would keep far more drinking water and allow me to work the total region in one endeavor.

Mid-Tones
What I did: I utilized “Green Grey #09” for the distant hills, “Ivy #11” to block the mid-tones for the trees, and “Chestnut #13” for the crimson shadow parts. The #10 Sable Brush worked effectively to create an initial clean and build light textural brushwork. Soon after the initial wash dried, I applied a layer of dried pencil to develop a dried textured outcome on the tough tooth of the paper.
What I’d Do In another way: The color in the distant hills is not developing the effect I would have liked. Specified a next consider, I would make a more powerful initial layer of “Sky Blue #07.” This would build much more atmospheric length. In the shadow locations of the developing, I would use “Cool Brown #13.”
Closing Analyze
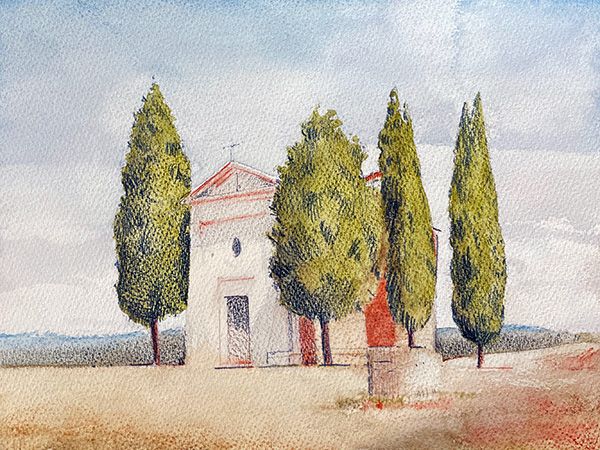
What I did: I utilised a wash of “Sage #12” on the floor and chapel to advert warmth. Depth, texture, and shadow was added utilizing hatching with a dry “Shadow #05” pencil.
What I’d Do Otherwise: The reddish shadow places are far too robust, so I would start out with a stronger layer of “Sage #12” and a lighter layer of “Chestnut #13” to indicate the shadows.
What Was Uncovered
Graphitint on watercolor paper is a persuasive pairing. The resulting image has a persuasive mild good quality and texture, but I need to much better understand the colours and how to layer them successfully. I get pleasure from making layers of hatch marks and facts on leading of the coloured washes and seem forward to performing further more with these components!